*Note: Select the 64-bit or 32-bit version that matches your work station.
Take the following steps to install the software:
- Click on Installation
- Click on New SQL Server stand-alone installation
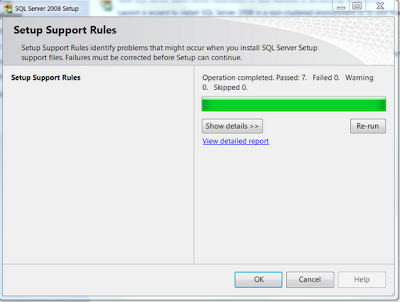
- On Setup Support Rules click OK
- The next dialog is kind of misleading. It says that is gathering user settings, but there is no progress. Just ignore this and click on Install.
- The next dialog shows a set of rules. All rules should be on Passed status. Windows firewall may give you a warning. This is if you need to open a port for external access. Since this is for development purposes, we will ignore this rule and just click on Next.
- The installation type dialog is also a bit confusing. You would think that you just need to add a feature, but in fact we need to select “Perform a new installation…”. The installation of the client tools is under this option. Select it and click Next.
- On product key, just click Next. It should be on Specify a free edition by default
- Accept the terms and click Next
- We are finally getting there. On the Feature Selection dialog, we can check the Management Tools - Basic option. Now click Next.
- Click Next on the Disk space requirements.
- If you feel like reporting errors to Microsoft, check the error and usage reporting. If not, just click Next
- Another Installation Rule dialog is displayed, just click Next
- We are finally there. On Ready to Install click Install. The installation process should start. Let it run until you get the Setup process complete message and click Next.
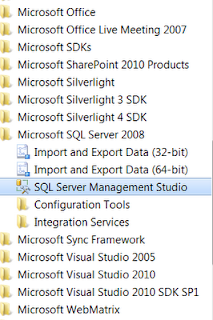
- We should now see the Complete dialog. YES!!!. Just close the dialog and let’s verify that the software is there by looking at Microsoft SQL Server 2008 program group.
- We find the SQL Server Management Studio program shortcut
That was a long process, but if successful you should be able to connect to SQL Server using SSMS. Let’s just hope that for the next versions this installation process becomes much easier.


